[分享] ROS2 Web开发做个遥控器
-
ROS(机器人操作系统)是一个用于开发机器人软件的开源框架,而rosbridge_server则提供了一种在ROS和其他系统之间进行通信的方式。在本文中,我们将介绍如何通过Web页面实现一个简单的ROS遥控器,使用rosbridge_websocket连接到ROS系统,并通过按键控制机器人的运动。
准备工作
首先,确保你已经安装了ROS2,并且已经启动了rosbridge_server的rosbridge_websocket插件。你可以使用以下命令安装和启动:
sudo apt install ros-$ROS_DISTRO-rosbridge-suite
ros2 run rosbridge_server rosbridge_websocket
这将在本地WebSocket服务器的9090端口上启动rosbridge_websocket。
创建Web
接着随便新建一个文件 index.html
<!DOCTYPE html>
<html>

<head>
  <meta charset="utf-8" />
  <style>
    body {
      display: flex;
      flex-direction: column;
      align-items: center;
      justify-content: center;
      height: 100vh;
      font-family: Arial, sans-serif;
    }

    button {
      margin: 5px;
      padding: 10px 20px;
      font-size: 18px;
      border: 2px solid #3498db;
      border-radius: 5px;
      background-color: #3498db;
      color: #ffffff;
      cursor: pointer;
      transition: background-color 0.3s;
    }

    button:hover {
      background-color: #2980b9;
    }
  </style>
  <script src="https://cdn.jsdelivr.net/npm/roslib@1.3.0/build/roslib.js"></script>
</head>

<body>
  <h1>ROS Web Controller</h1>
  <div>
    <button onclick="moveForward()">Forward</button>
    <button onclick="moveBackward()">Backward</button>
  </div>
  <div>
    <button onclick="moveLeft()">Left</button>
    <button onclick="stopMovement()">Stop</button>
    <button onclick="moveRight()">Right</button>
  </div>

  <script>
    let ros;
    let cmdVel;

    function startConnection() {
      ros = new ROSLIB.Ros({
        url: 'ws://localhost:9090' // 替换为你的Rosbridge服务器地址,主要将 localhost 改成你的主机IP地址,比如 ws://192.168.1.2:9090
      });

      ros.on('connection', () => {
        console.log('Connected to ROS Bridge');
        cmdVel = new ROSLIB.Topic({
          ros: ros,
          name: '/cmd_vel',
          messageType: 'geometry_msgs/Twist'
        });
      });

      ros.on('error', (error) => {
        console.error('Error connecting to ROS: ', error);
        alert('Error connecting to ROS: 9090', error);
      });

      ros.on('close', () => {
        console.log('Disconnected from ROS');
        alert('Disconnected from ROS');
      });
    }

    function move(direction) {
      if (!ros) {
        console.error('ROS connection not established');
        alert('ROS connection not established');
        return;
      }

      if (!cmdVel) {
        console.error('Publisher not created');
        alert('Publisher not created');
        return;
      }

      const twist = new ROSLIB.Message({
        linear: {
          x: direction.linear.x,
          y: direction.linear.y,
          z: direction.linear.z
        },
        angular: {
          x: direction.angular.x,
          y: direction.angular.y,
          z: direction.angular.z
        }
      });

      cmdVel.publish(twist);
    }

    function moveForward() {
      const moveForwardMsg = {
        linear: { x: 0.2, y: 0, z: 0 },
        angular: { x: 0, y: 0, z: 0 }
      };
      move(moveForwardMsg);
    }

    function moveBackward() {
      const moveBackwardMsg = {
        linear: { x: -0.2, y: 0, z: 0 },
        angular: { x: 0, y: 0, z: 0 }
      };
      move(moveBackwardMsg);
    }

    function moveLeft() {
      const moveLeftMsg = {
        linear: { x: 0, y: 0.0, z: 0 },
        angular: { x: 0, y: 0, z: 0.5 }
      };
      move(moveLeftMsg);
    }

    function moveRight() {
      const moveRightMsg = {
        linear: { x: 0, y: 0, z: 0 },
        angular: { x: 0, y: 0, z: -0.5 }
      };
      move(moveRightMsg);
    }

    function stopMovement() {
      const stopMsg = {
        linear: { x: 0, y: 0, z: 0 },
        angular: { x: 0, y: 0, z: 0 }
      };
      move(stopMsg);
    }

    startConnection(); // 初始化ROS连接
  </script>
</body>

</html>
访问服务
接着使用 python 来新建一个服务器:
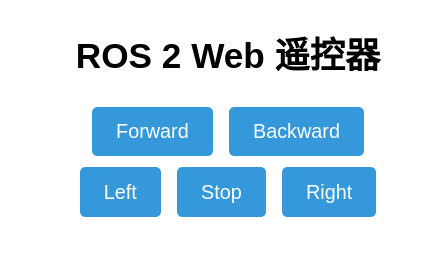
python3 -m http.server接着访问:http://0.0.0.0:8000/ 就可以看到下面的界面(这个网页可以远程访问,只需要修改下访问的IP地址为你的电脑局域网地址,比如用手机可以看到这个页面,这样手机就相当于一个无线遥控器用了)

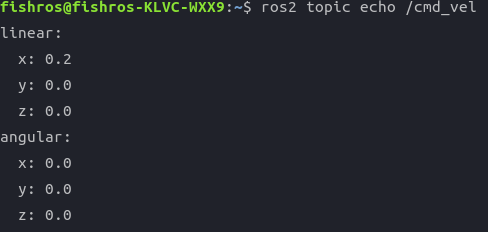
点击界面上的按钮就可以发布数据到 cmd_vel 话题上,连上 fishbot 就可以控制机器人移动了
远程访问需要替换html中这一个地址:url: 'ws://localhost:9090' // 替换为你的Rosbridge服务器地址,主要将 localhost 改成你的主机IP地址,比如 ws://192.168.1.2:9090
原理介绍
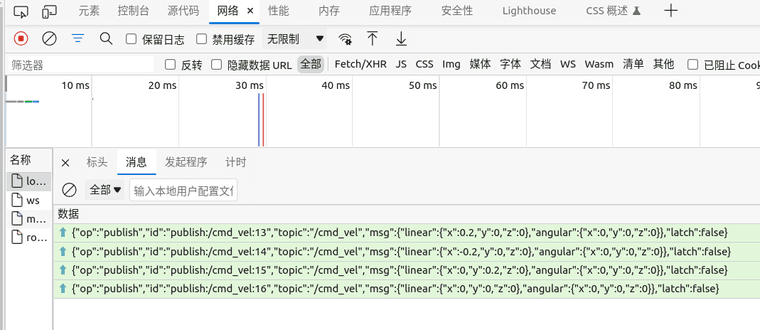
rosbridge_websocket 节点会在本地的9090端口启动一个websocker服务,然后将 ros 数据进行互相的序列化传输,web端使用的是最常见的 websocket。
rosbridge_websocket <----websocket(json)---->web-html
从浏览器后台可以看到数据的传输
-
问题如下:
1、 http://0.0.0.0:8000/ 这个网页手机无法打开。
2、 http://0.0.0.0:8000/ 打开的界面不一致
3、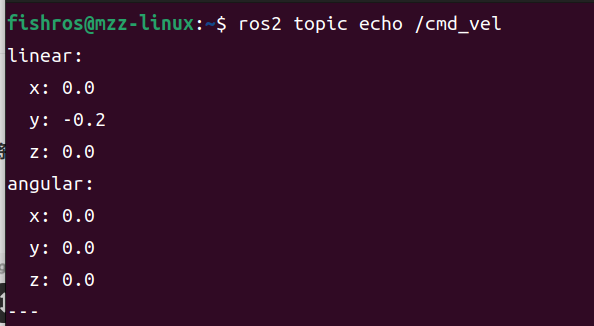 能看到话题信息,但是无法控制小车移动(四驱)
可能:
是否与未替换Rosbridge服务器地址有关,不会替换。 -
@2826778595 已经根据你的问题重新更新了文章,代码放错了少了css样式,远程访问地址确实需要修改,所有的 0.0.0.0 和 localhost 要替换成主机在局域网的ip地址,且保证能够联通,无法控制问题可能是小车需要连续发送才有效果
-
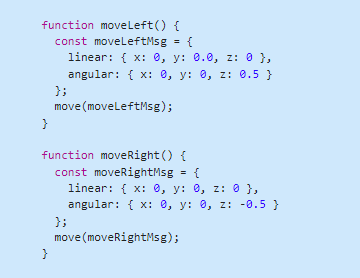
web遥控器右行angular的Z轴需要改为-0.5. -
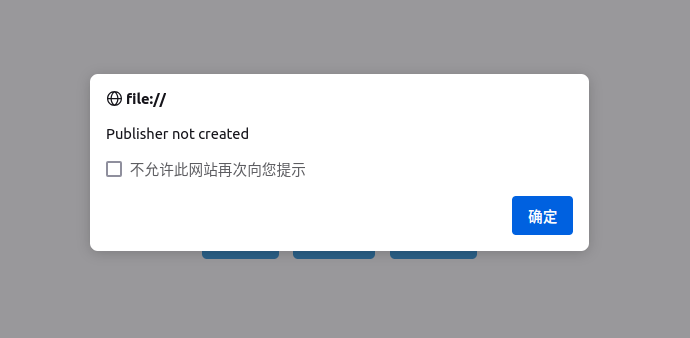
网站打不开,打开网站文件是这个样子,已经替换主机ip了。 -
@小鱼 在 [分享] ROS2 Web开发做个遥控器 中说:
接着访问:http://0.0.0.0:8000/ 就可以看到下面的界面(这个网页可以远程访问,只需要修改下访问的IP地址为你的电脑局域网地址,比如用手机可以看到这个页面,这样手机就相当于一个无线遥控器用了)
这种http方式访问